In this article, we take a look at the initial configuration of a Cisco WLC 9800 and some recommended basic general settings that should be a part of most deployments.
If you are setting up High Availability between two WLC 9800’s, I recommend looking the article in the link below before following along further in this article.
Cisco WLC 9800 - High Availability SSO RMI + RP Configuration (CLI)
Introduction
The purpose of this article is to quickly go through several general settings and configurations that should be applied in most deployments. I mainly created this article for myself so that I always have quick access to this “template” of configuration and have it function as a checklist for future deployments.
Detailed configuration for various Profiles and Tags will not be covered in this article, there are already plenty of other resources available online on this matter, and that kind of configuration is very unique to each deployment, making it hard to cover in short in this article.
This article will cover some steps to complete before starting the work on Profiles and Tags.
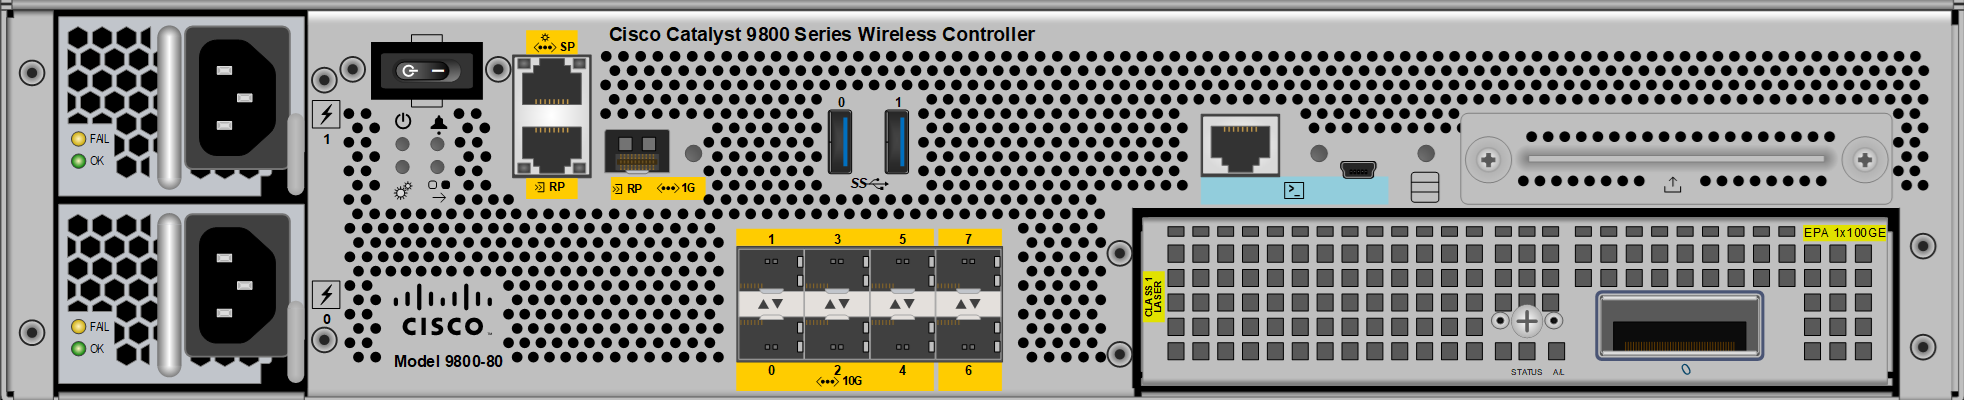
The configuration below is based on the installation of a physical appliance WLC 9800. If you are setting up a virtual WLC 9800 (the 9800-CL model), you may need to generate a self-signed AP certificate using this guide from Cisco:
Getting out of the Day-0 wizard
While Cisco has introduced a Day-0 wizard for the GUI in many of their products in the last few years, I prefer not to use them because most of the time I already know what I need to configure without having my hand held by Cisco. For this reason, I chose to disable this wizard and instead dive right into the CLI for the initial configuration. The Day-0 wizard is displayed when you connect via HTTPS to the WLC for the first time, since it runs a DHCP server out-of-the-box you can connect your PC directly to the WLC to get to this wizard.
To disable the Day-0 wizard, simply configure a country code via the CLI and then save the configuration to disable the Day-0 wizard from showing up in the HTTPS sessions afterward. To set the country code, we must first disable the wireless radios globally, and then re-enable them after the country code has been set.
Adjust the country code (“SE”) to match your regulatory domain, use the “tab” key to see what is available. Depending on your IOS-XE software version, all radios might need to be shut down to update the regulatory domain. The commands that do this will ask you to confirm that you are, to which you have to answer “y”, meaning “yes”.
config terminal
ap dot11 24ghz shutdown
y
ap dot11 5ghz shutdown
y
wireless country SE
y
no ap dot11 24ghz shutdown
no ap dot11 5ghz shutdown
do write memory
General Configuration
The following general configuration is presented as-is, with some commentary where I felt it was necessary.
service nagle
no service pad
no service config
service tcp-keepalives-in
service tcp-keepalives-out
service timestamps debug datetime msec localtime show-timezone
service timestamps log datetime msec localtime show-timezone
service sequence-numbers
service password-encryption
! Filter logs saved in the buffered log ("show logging")
! Removes useless log entries every time an admin clicks on ANYTHING in the web interface:
logging discriminator FILTER msg-body drops Configured programmatically by process SEP_webui_wsma_http
logging buffered discriminator FILTER 16777216 informational
no logging console
! Configure Timezone according to your needs:
clock timezone CET 1 0
clock summer-time CEST recurring last Sun Mar 2:00 last Sun Oct 3:00
username admin privilege 15 algorithm-type sha256 secret DISCO123!
enable algorithm-type sha256 secret S3CR3T123!
! Simple AAA login using Local accounts:
aaa new-model
aaa authentication login default local
aaa authorization exec default local if-authenticated
aaa authorization console
! Display login failures (all) and success (last 1 hour) for your username after successful login:
aaa login display number-failures
aaa login success-track-conf-time 1
ip domain lookup
ip domain name yourCompany.com
ip name-server 10.10.11.101
ip name-server 10.10.11.102
login on-failure log
login on-success log
login delay 1
! Setup automatic configuration backup to SFTP/SCP/FTP/TFTP server.
! Can execute on "write mem" or in set time intervals, or both.
! If you are using SFTP/SCP, you must allow "transport output ssh" on VTY lines.
archive
log config
logging enable
path sftp://username:password@10.10.11.100/WLC/$h
write-memory
time-period 1440
! Enable SSH with strong encryption algorithms (remember to update your terminal software like Putty etc. to make sure you support this modern encryption):
crypto key generate rsa modulus 4096 label SSH-4096-RSA-KEY
ip ssh logging events
ip ssh version 2
ip ssh time-out 60
ip ssh authentication-retries 3
ip ssh rsa keypair-name SSH-4096-RSA-KEY
ip ssh server algorithm authentication keyboard
ip ssh server algorithm kex ecdh-sha2-nistp521 ecdh-sha2-nistp384
ip ssh server algorithm hostkey rsa-sha2-512 rsa-sha2-256
ip ssh server algorithm encryption aes256-gcm aes256-ctr
ip ssh server algorithm mac hmac-sha2-512 hmac-sha2-256
ip ssh server algorithm publickey ecdsa-sha2-nistp521 ecdsa-sha2-nistp384
ip ssh source-interface Vlan999
! If for some reason you need to revert to default encryption, use the "default ip ssh server algorithm authentication/kex/hostkey/and so on commands.
! Enable AP Tag Persistency (tags are saved/stored on AP, useful for N+1 redundancy setups):
ap tag persistency enable
! Enable VLAN-roaming (and more) between Policy Profiles:
wireless client vlan-persistent
! Enable Device Classification globally:
device classifier
! Enable Management via Wireless (if desired):
wireless mgmt-via-wireless
! Configure Basic SNMP general settings:
snmp-server location Headquarters AA01 Floor 0 Server room B112
snmp-server contact IT-personnel noc@yourCompany.com Phone 555-123-123
! Configure SNMPv3 Read/Write/Traps/Informs using the article below:
! Cisco Switch / Router SNMPv3 Configuration for IOS / IOS-XE
! Enable NETCONF for DNA Center/API integrations:
! Do note it might take up to 5 minutes before NETCONF process is ready for connections:
netconf-yang
netconf-yang ssh port 830
netconf-yang ssh ipv4 access-list name NETCONF_ACCESS
! Configure NETCONF authentication (17.9.1+)
! Local username in this case, adjust accordingly for RADIUS/TACACS:
aaa authentication login LOCAL-ONLY-AUTHC local
aaa authorization exec LOCAL-ONLY-AUTHZ local
yang-interfaces aaa authentication method-list LOCAL-ONLY-AUTHC
yang-interfaces aaa authorization method-list LOCAL-ONLY-AUTHZ
ip access-list standard NETCONF_ACCESS
10 permit 10.10.1.0 0.0.0.255
20 permit 10.10.2.0 0.0.0.255
30 permit 10.10.3.0 0.0.0.255
! Enable HTTPS server and related security settings:
no ip http server
ip http secure-server
ip http authentication local
ip http client source-interface Vlan999
ip http access-class ipv4 HTTPS_ACCESS
ip access-list standard HTTPS_ACCESS
10 permit 10.10.1.0 0.0.0.255
20 permit 10.10.2.0 0.0.0.255
30 permit 10.10.3.0 0.0.0.255
! Configure CON/VTY LINES:
line con 0
exec-timeout 15 0
logging synchronous
line vty 0 97
exec-timeout 15 0
transport input ssh
transport output none
transport preferred none
access-class VTY_ACCESS in
ip access-list standard VTY_ACCESS
10 permit 10.10.1.0 0.0.0.255
20 permit 10.10.2.0 0.0.0.255
30 permit 10.10.3.0 0.0.0.255
! Enable Banners for Login and MOTD:
banner login ^
!! WARNING !!
!! UNAUTHORIZED ACCESS TO THIS DEVICE IS PROHIBITED !!
^
banner motd ^
You have connected to $(hostname).$(domain) on line $(line).
^
! Configure NTP server hostname using IPv4 ("ip") for transport or just an IP address:
ntp server ip 0.se.pool.ntp.org
ntp server ip 1.se.pool.ntp.org
ntp server 10.77.77.100
ntp source Vlan999
! Enable HTTP Redirection for WebAuth/CWA without enabling HTTP for Admin GUI and configure Virtual IPs using non-routable IP addresses:
parameter-map type webauth global
type webauth
virtual-ip ipv4 192.0.2.1
virtual-ip ipv6 2001:DB8::1
webauth-http-enable
! EEM Script to automatically run "write memory" every 24 hours:
event manager applet AUTO-WRITE-MEM-24H authorization bypass
event timer watchdog time 86400
action 1.0 cli command "enable"
action 2.0 cli command "write memory"
action 3.0 syslog msg "AUTO-WRITE-MEM-24H SCRIPT HAS BEEN RUN."
! Create Management VLAN + VLAN Interface and set Default Route:
! Do note that Cisco recommends that you use different VLAN(s) for connecting the Access Points themselves if your deployment has more than 100 Access Points:
! If you already set up High Availability SSO using the guide at the top of the article, you may skip this step and jump to the "Create Client VLANs" step instead.
vlan 999
name WLC-MGMT
interface Vlan 999
description WLC-MGMT
ip address 10.10.99.11 255.255.255.0
no shutdown
ip route 0.0.0.0 0.0.0.0 10.10.99.1 name DEFAULT-ROUTE
! Designate VLAN as Management VLAN (without this APs won't join the WLC):
wireless management interface Vlan999
! Shutdown VLAN 1:
interface Vlan 1
shutdown
! Shutdown Out-of-Band Service (Management) port, unless you plan to use it:
interface GigabitEthernet0
shutdown
! Create Client VLANs:
vlan 10
name Admin
vlan 20
name Student
vlan 30
name Contractor
do write memory
Configure Physical Interfaces on WLC
! Configure WLC physical interfaces (preferably using LACP Port-Channel):
interface range
Te0/0/0-3
description
Trunk Upstream Core
channel-group
1 mode active
interface portchannel 1
description Trunk Upstream Core
switchport mode trunk
switchport trunk allowed vlan all
no shutdown
do write memory
Configure Physical Interfaces on upstream Core Switch/Router
Don’t forget to configure the corresponding configuration on you upstream core switch which the WLC will connect to! If you want to prune (limit) the VLANs flowing between the WLC and the upstream core switch, use the command “switchport allowed vlan <VLANs>” on the core switch instead, and not on the WLC.
! Configure Core physical interfaces (preferably using LACP Port-Channel):
interface range
Te1/1/1-2, Te2/1/1-2
description
Trunk WLC9800
channel-group
1 mode active
interface portchannel 1
description Trunk WLC9800 Portchannel
switchport mode trunk
switchport trunk allowed vlan 10,20,30,40,999
spanning-tree portfast edge trunk
no shutdown
do write memory
Put IP Helper Addresses on upstream Core Switch/Router
This step is easy to miss if you are migrating from an old AireOS WLC to the newer 9800 WLC. Since the old AireOS WLCs often used DHCP Proxy (relay) using their own VLAN interface in every client network, there was no requirement to put IP Helper Addresses on the upstream core switch to which the WLC was connected.
However, for WLC 9800, Cisco does recommend to NOT use the WLC for DHCP proxy/relay feature, and instead, the upstream core switch should perform this task.
! Add IP Helper addresses on your CORE SWITCH/ROUTER, not on the WLC!
interface Vlan 10
ip helper-address
10.22.22.11
ip helper-address
10.22.22.12
interface Vlan 20
ip helper-address
10.22.22.11
ip helper-address
10.22.22.12
interface Vlan 30
ip helper-address
10.22.22.11
ip helper-address
10.22.22.12
do write memory
Upgrade WLC software to the latest recommended release
Since new WLCs can be delivered with whatever software version made sense at the time, make sure to check what the current recommended software version is and upgrade to it pre-deployment.
Recommended Cisco IOS XE Releases for Catalyst 9800 Wireless LAN Controllers
Configure Profiles and Tags
Setting up Profiles and Tags, which is the configuration that is mostly unique to every deployment, requires you to get familiar with the overall concept.
I recommend reading through Cisco’s official documentation at the link below.
Understand Catalyst 9800 Wireless Controllers Configuration Model
After reading through Cisco’s documentation, I suggest looking at the article below for some tips on how to work smarter with naming your profiles and tags to keep things organized.
Cisco WLC 9800 - Working with Tags and Profiles
Depending on which WLC 9800 hardware, or virtual, model you are deploying, remember to plan your Site Tag structure accordingly for maximum performance by utilizing all Wierless Network Control Daemons (“WNCD”) somewhat equally. Read through the section on the link below to get up to speed on how to do this.
Cisco Catalyst 9800 Series Configuration Best Practices - Designing with site tags in mind
Go through the built-in “Best Practice” dashboard
After you are done setting up most of your deployment’s unique configuration (mainly the Profiles and Tags). Regardless of your deployment being completely new or migrated from a previous AireOS deployment, check out the built-in Best Practice dashboard for suggestions on how to improve your deployment.
You can find this by navigating to Administration > Best Practices.
Don’t just click “Fix it now” on everything where possible, read what it does and what it means for your deployment. You don’t need to get a “full score” on this dashboard, just see if there’s anything interesting that seems useful to your deployment.
Go through Cisco’s Best Practice Guide for 9800 Controllers
In addition to the built-in Best Practice dashboard inside the WLC itself, Cisco has a section on its website with the latest best practices for most deployments. You can find this documentation at the link below.
Cisco Catalyst 9800 Series Configuration Best Practices
Increase web GUI table entries to 100
By default, any table presented in the web GUI of the WLC only contains 10 entries and then starts a new page. This will be very annoying once your network starts getting busy with loads of access points and clients. You can increase the default table entries to 100, making it much easier to work in the web GUI, by heading into the Preference menu. This configuration can only be done in the web GUI.
Configure a WLC Discovery Method for APs
In order for your access points to find your WLC, you will need to decide on which method to use for this purpose and configure it in your network. Depending on the size of your network, some methods are easier to deploy than others.
Use DNS - set an A record for “cisco-capwap-controller.yourCompany.com” and point it to the management IP address of the WLC. This method is usually the easiest one to set up.
Use DHCP Option 43 (IPv4) or 52 (IPv6) to specify the WLC’s management IP address as a DHCP option in the DHCP pool in which access points will receive their own IP addresses. An Option 43 generator for Cisco WLCs can be found on this website: Wireless Controllers Option 43 Generator (shimi.net)
Use Broadcast - if access points are connected to the same VLAN as the WLC’s management IP address, they will be able to find the WLC using broadcast packets. This option is mostly useful for smaller deployments.
Use static WLC IP assignment - while you can manually enter the WLC’s management IP address into an access point via CLI, try to avoid this method.
Activate Smart Licensing
Connect the WLC to the appropriate Cisco Smart Account containing all of the DNA (subscription licenses) and Network Stack (perpetual licenses) to be license-compliant. There are multiple ways to do this depending on if your network is air-gapped or not, or if you are using DNA Center or not to manage the WLC. Find the installation/configuration guide for your WLCs-specific software version and see what applies.
References
Cisco WLC 9800 - High Availability RMI + RP Configuration (CLI) - wiresandwi.fi
Recommended Cisco IOS XE Releases for Catalyst 9800 Wireless LAN Controllers
Understand Catalyst 9800 Wireless Controllers Configuration Model
Cisco WLC 9800 - Working with Tags and Profiles - wiresandwi.fi
Cisco Catalyst 9800 Series Configuration Best Practices