Disclaimer: I am by no means an expert on Aruba’s ClearPass product. There are tons of features I haven’t had a chance to check out yet as my time is limited. This article is written from the point of view of someone who works with Cisco ISE pretty much every week.
Introduction
I’ve been working with Cisco’s Identity Services Engine, or ISE, since version 1.1 of it. It has come a long way in terms of features and ease of use, but it is still not as good a product as I would like it to be.
As someone who spends a lot of time reading up on different networking solutions on forums, naturally, I get to see what else is out there and what others are using to meet their customers’ needs.
Let’s get into it!
General GUI differences
I’m gonna start this comparison with one of the major differences. One of my biggest complaints about the Cisco ISE’s GUI is that it is slooow to work with. Like really, really slow. Even though the ISE GUI was reworked in ISE 2.0 to make it more modern and then later in ISE 2.3 the Policy Sets configuration got a new look, but the biggest problem still hasn’t been fixed: working in ISE takes forever sometimes.
Even completely new ISE deployments are slow to work with for some reason. It doesn’t matter if the ISE deployment manages and serves 25 000 endpoints or none at all, navigating the GUI takes a lot of time and sometimes I think my nodes have just stopped working at all.
The user interface in ClearPass has an “older” look to it but jumping around in the different sections of configuration is very smooth and takes no time at all. I don’t mind that it doesn’t have that typical modern, flat, blocky HTML5 look that ISE has been moving towards since version 2.0, even more so in version 2.3 and forward since the Policy Sets configuration page was rehauled.
ClearPass shows its very rapid GUI…
…while ISE not so much.
Dashboard
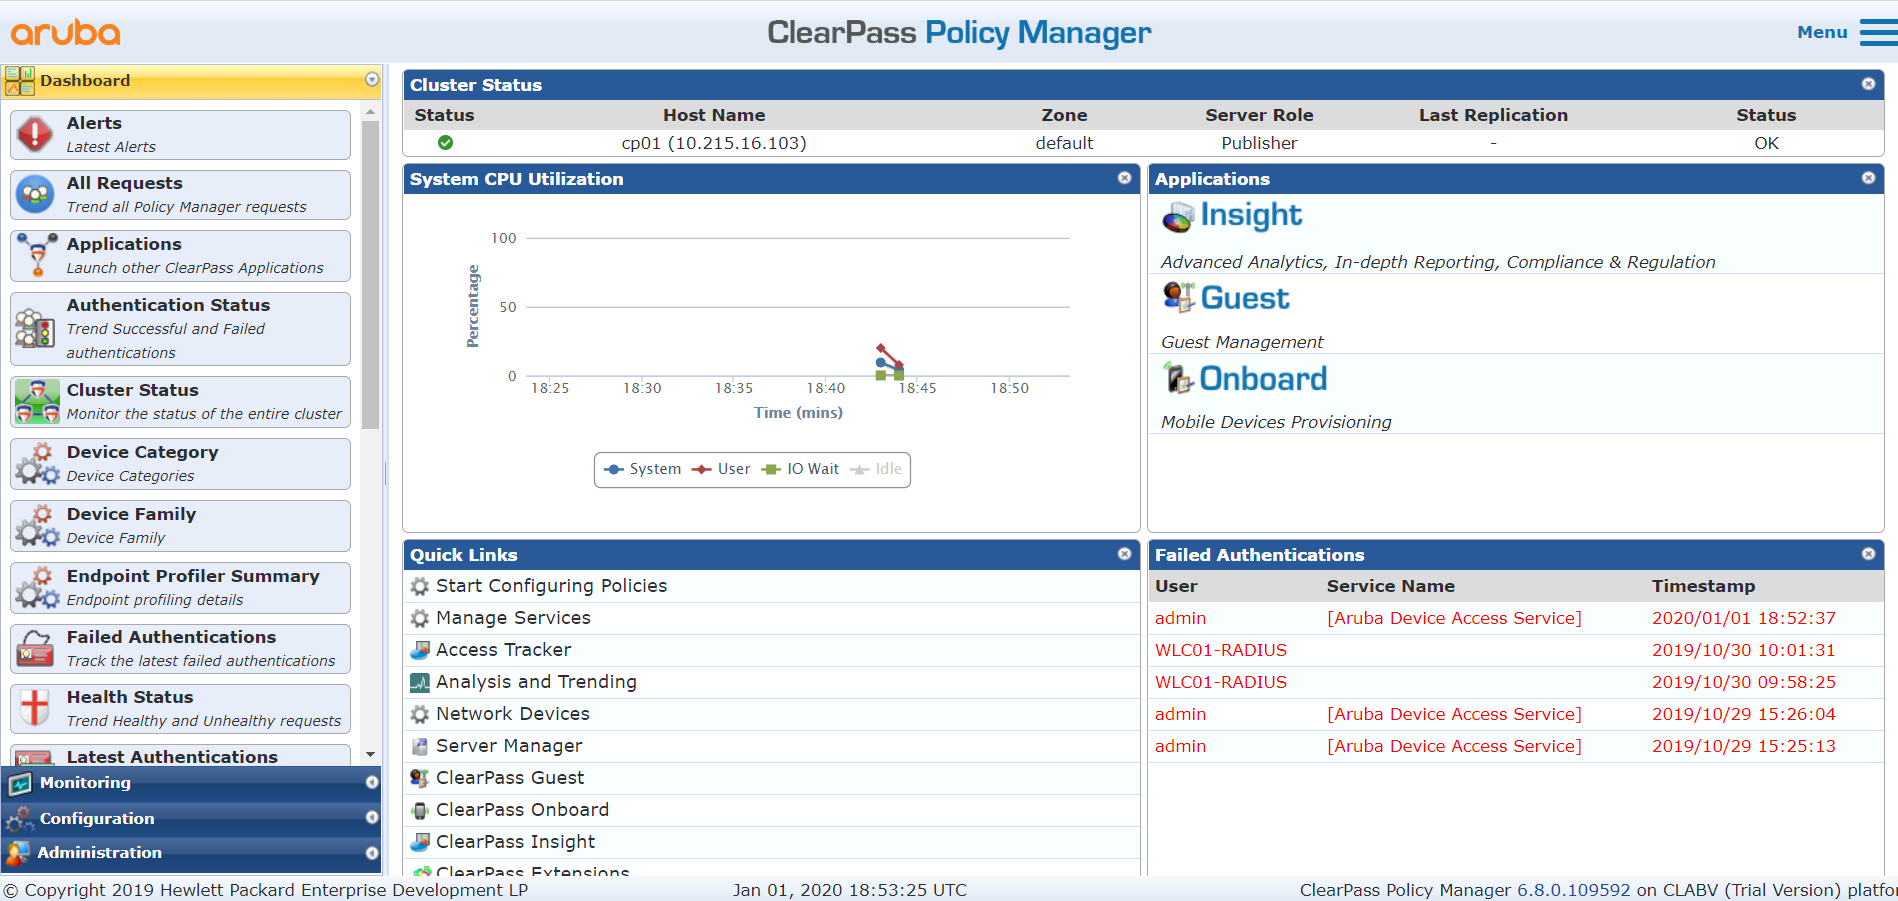
When you log in to either ISE or ClearPass you are, by default, greeted by a Dashboard screen showing you the general status of the services and some key metrics like successful/failed authentications and CPU/RAM usage of the nodes themselves. Both systems have pretty customizable Dashboards in that you can add and remove panels of information as you wish. The modern look of the ISE Dashboards with its big metric number will probably get your management people going and I think it has a better appearance overall as well. ClearPass does however have a Quick Links panel (as you can see in the bottom left of the picture below) that can take you to some of the most useful pages, which I found myself using a lot after initial setup and configuration.
ClearPass’ default Dashboard.
ISE’s default Dashboard.
Active Directory integration
Utilizing an external source of identities is very common for any network access solution and taking advantage of the identities and data in a Microsoft Active Directory is among the most common practices.
In ClearPass, joining the Active Directory has to be configured in each node one-by-one, as far as I can tell and you only join one domain controller at a time. It’s not really a big deal since you rarely should have to re-join the Active Directory after the is up and running but if you have a lot of ClearPass nodes and a lot of domain controllers it could take some time.
After joining the Active Directory, you can utilize any Group or Attribute in the Active Directory and you simply do that by creating rules and manually typing in the Group you want to use. One benefit of this is that it’s very easy to play around and make changes to the rules you have configured, on the other hand, you have to make sure to type in everything correctly and double-check your work for every risk of typos.
As for Attributes, like in ISE, they need to be “imported” first which means you need to address them in the Active Directory integration configuration. After that, you can use them freely and type in different values to be matched.
Joining an AD in ClearPass.
In ISE, all nodes of a cluster can join an Active Directory simultaneously. To join you enter a username and password of an Active Directory account that is allowed to create a new machine account. For every ISE-node in the cluster, an account with the corresponding ISE-node name will be created (like ise01, ise02, ise03, and so on.).
After joining the Active Directory, you can browse through exiting Groups and User Attributes that can be imported in ISE to create authentication and authorization rules. One of the advantages of Groups being imported into ISE is that you will have a lesser chance to screw up because the names of the Groups and Attributes are selectable in ISE, you cannot just type in your own freely. As for the value of the Attributes, they must be typed in manually.
Joining all ISE-nodes of a cluster to an AD - easy!
Certificate Management
Secure digital certificates are an important step in deploying a secure network access solution. They have their different uses in areas related to EAP authentication, guest portals, and internal services within the solution. A few years ago I wrote an article about the different use-cases for different types of certificates when it comes network access solutions, which you can check out here if you are interested.
In both products, certificate management is performed on the administrative nodes which in ISE is called a Policy Administration Node (PAN), and in ClearPass it is called a Publisher.
In ClearPass, node certificates are not used for mutual authentication between nodes that are working together in the same cluster. Only the username and password for the so-called “appadmin” account are needed to join together two or more nodes in a cluster.
In ISE, all nodes of a cluster must trust the root certificate of each of the other nodes’ server certificates in the cluster. In addition, an administrator username and password of the joining node must be entered on the Policy Administration Node (PAN) who is to get a node joined to it.
In terms of performing the Certificate Signing Request, a CSR, both ISE and ClearPass have a built-in function to do this but here I must say the one in Cisco ISE is better than the one in ClearPass, mostly because it is more advanced and allows for more flexibility when deciding what kind of information should be included in the final certificate.
In bigger deployments, I am a fan of utilizing one certificate for several different functions. One could argue about the security risk of using one certificate in multiple places, but I’ll leave that discussion for another day.
One type of certificate structure that I find useful is using the Wildcard value (like *.mycompany.com) in the Subject Alternative Name (SAN) of a certificate. This is different from using a Wildcard value in the Common Name of a certificate, which is usually not allowed in terms of EAP-authentication (Windows clients will downright reject a Wildcard value as Common Name). However, if you instead put a friendly name like “ise.mycompany.com” as Common Name and then you put a Wildcard as SAN, you can then use this certificate for a lot of things like EAP-authentication, guest portals, and more.
An alternative to using a Wildcard value as a SAN is to have multiple SAN valued with the DNS-name of each of your nodes (like ise01.mycompany.com and ise02.mycompany.com or a similar naming scheme for ClearPass), but this means you can’t easily use the certificate for potential new nodes in the future without remaking the certificate.
In ISE you can create these types of Wildcard SAN certificates directly on the Certificate Signing Request page because you can add and remove fields to be included almost however you want, or you can choose to create different CSRs for every node in the deployment.
In ClearPass however, the Certificate Signing Request page is much more limited as you can see on the image below. Trying to enter a Wildcard value anywhere in the certificate will result in an error, and the CSR will not be created for you to use.
You can absolutely use Wildcard SAN-certificates in a ClearPass deployment, the certificate itself just can’t be created using the built-in functions in ClearPass and you will have to resort to external tools such as OpenSSL to create the CSR, which will be turned into the final certificate by a Certificate Authority, be it an internal CA or an external third-party trusted one (like GeoTrust, GlobalSign and so on).
Creating a CSR in ClearPass.
Creating a CSR in ISE, where more options result in a very flexible CSR tool.
Configuring Rules
Coming from ISE and trying to learn ClearPass isn’t too hard, the general structure of the two solutions is very similar and you can easily translate the different terms used to create a complete set of authentication and authorization rules.
ISE Policy Sets are like ClearPass’ Services
ISE Authentication Policies are like ClearPass’ Authentication Methods
ISE External Identity Sources are like ClearPass’ Authentication Sources
ISE Authorization Policies are like ClearPass’ Enforcement Policies
ISE Authorization Profiles are like ClearPass’ Enforcement Profiles
And there are many more other similarities!
I would say that configuring rules in ISE and ClearPass is done in pretty much the same way: you pick your conditions (which could be Groups, Attributes, and more), and when a match is found a result (like VLAN or ACL assignment) is forced onto the user’s connection.
Both solutions have a lot of default parameters and examples built-in that you can copy and change into your own liking based on what are your requirements. I would say that ClearPass has a cleaner GUI when it comes to this, the rules are more concentrated and you can have a lot of rules on a single page of your screen, while ISE (since version 2.3) has been making the look of their rules very blocky and modern, which means everything is very big and every line of every rule takes a lot of space. I find myself often scrolling through page after page with rules in ISE, while in ClearPass it feels a bit cleaner.
On the other hand, I haven’t found a way to actually name the rules in ClearPass, which can be done in ISE. I’ve worked on bigger ISE installations with hundreds of Authorization Policies and being able to give every rule a name is a big helper, especially when there are a lot of different conditions related to the rules like Groups, Attributes, Hostnames, Managed Staus, BYOD, Certificate fields and so on.
Creating rules in ClearPass.
Creating rules in ISE.
Access Tracker vs. Live Log
Viewing and analyzing network access attempts are vital to both the initial configuration and the daily operation of a secure network access solution. When implementing new rules to fit your needs you immediately want to be able to see if they are successful and working as intended.
In ClearPass, the Access Tracker is what shows you all the network access attempts that take place and what kind of access (or no access) they resulted in. One of the key advantages in ClearPass is that this log goes back a lot further than the Live Log in ISE, you can go back as long as you want here by changing the parameters at the top. At first, there is a bit less information displayed in the list of authentication attempts and I had to add a few columns myself manually to get to the view of the information I wanted.
Clicking on the line of an attempt also brings up a window of more detailed information in ClearPass, I would say it has pretty much the same types of information as the one in ISE
ClearPass’ Access Tracker showing live attempts as they happen.
Clicking on a login attempt shows a detailed log with lots of useful information.
In ISE, the Live Log is where you can all network access attempts taking place and whether they were successful or not, and what kind of authorization was applied to the end devices. The Live Log only goes back as far as 24 hours from the current time and if you want to look at attempts from earlier than that you can do that with the Reporting tool. The Reporting tool has a lot of different reports that can be generated from it and for newer people working with ISE, it seems like an extra step for nothing and I kind of think so myself.
Clicking on the little icon to get more information about a particular attempt brings up new a window containing detailed information about the attempt.
ISE’s Live Log which shows authentication attempts up to 24 hours ago.
A portion of the information is the detailed log of an authentication attempt in ISE.
Overall, the Access Tracker and the Live Log are very similar and the same goes for the sections of the detailed log.
Verdict?
Both ISE and ClearPass are robust products. While I have spent a lot more time with ISE and know of its shortcomings (like all the bugs) I cannot say if ClearPass is simply better overall, but the impression I get from using the product myself and reading a lot about it on forums is that it is a more stable product to use than ISE. Aruba has a lot of great ClearPass documentation on their website and not only that but there is also a great deal of documentation covering general concepts and technologies related to the ClearPass products, such as how 802.1x-authentication works and how digital certificates can be built to work best with secure authentications.
To set up my ClearPass server I went through only a few videos on Aruba’s Youtube account and then I was up and running. Cisco’s website also has a lot of documentation on ISE, but I feel they lack some official documentation on how to get going from the start: most of the things I learned about ISE comes from the ISE Community, where members and bloggers have made their own guides on to how to set up the different functions of ISE.
Cisco’s software across all their products and platforms has been a sharp thorn in my side the past 3 years or so mostly because pretty much all new updates come with a lot of bugs and problems.
I’m not gonna pick a “winner”, that wasn’t really the purpose of this article, anyway.